2493 products
Sort by:
2493 products
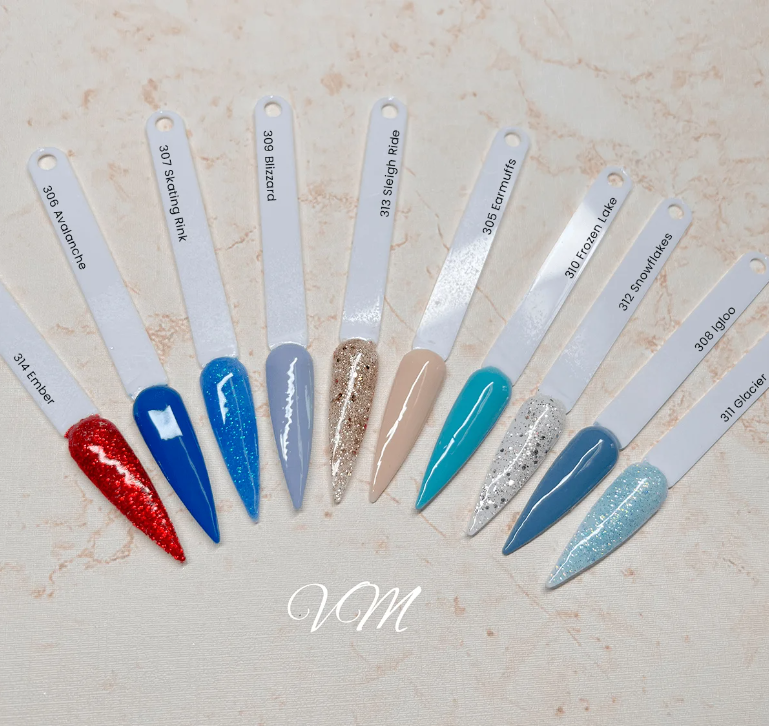

Oh Blush Powder Winter Wishes Collection (10pcs)
Collection: Winter Wishes
10 powders of various colors!
Add some color to your nails!
The ideal powder for use with resin techniques. Also perfect for working with resin balls, as well as gel and powder techniques.
Ready to use, no need to mix with other powders.
1 oz (28 gram) resealable plastic jar
The color on the screen may vary slightly from reality.
* For hygiene reasons, this item is non-exchangeable and non-refundable.
Included:
Oh Blush 305 Ear Muffs
Oh Blush 306 Avalanche
Oh Blush 307 Skating Rink
Oh Blush 308 Igloo
Oh Blush 309 Blizzard
Oh Blush 310 Frozen Lake
Oh Blush 311 Glacier
Oh Blush 312 Snowflakes
Oh Blush 313 Sleigh Ride
Oh Blush 314 Ember
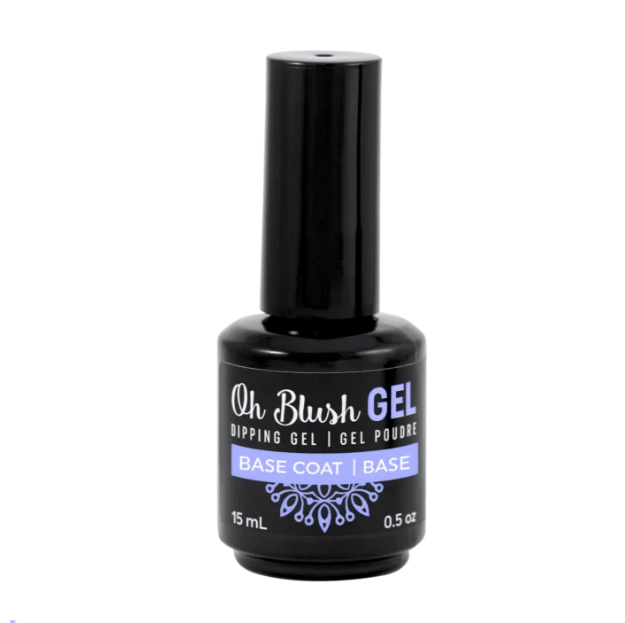
Oh Blush Gel and Powder - Base (15mL)
The Oh Blush Gel Base will give your Oh Blush Gel and powder coverage a better hold, in addition to limiting the chances of color shifting. The Oh Blush Gel Base is applied with the brush included in the bottle and must be cured in a UV or LED lamp.
The large Oh Blush family is expanding with the GEL range!
Oh Blush gel products allow for quick and easy application!
They are catalyzed in a UV or LED lamp.
They do not require any spray hardener, reducing the risk of allergies and intolerance to spray hardeners or acrylate-based products!
They can be used with all powders .
Preparation
- Brush nails with soap and water;
- Push back cuticles and file nails;
- Choose and adjust prostheses (if applicable);
- Run a yellow block over the nail and remove the dust;
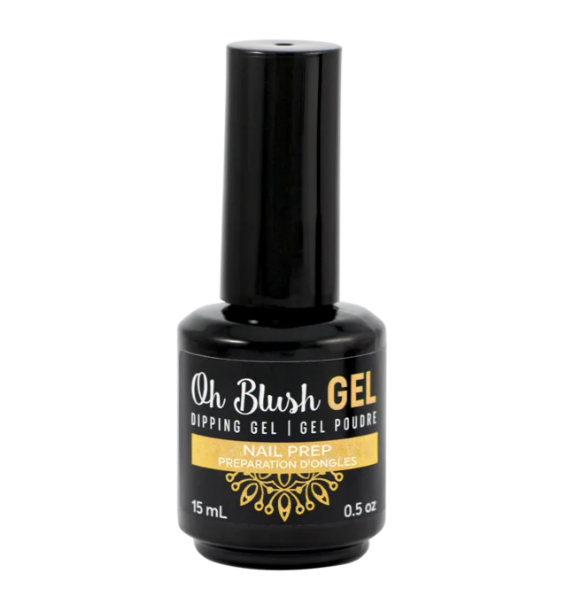
- Apply 2 coats of Oh Blush GEL PREP to the nail plate;
- Glue the prosthetics with the Oh Blush DIP BASE & FINISH (if applicable).
Steps for applying the Oh Blush Gel and Powder system
- Apply a very thin layer of Oh Blush GEL BASE and cure for 30 seconds under an 18W LED lamp or for 1 minute under a 36W UV lamp;
- Remove excess with a dry brush;
- Apply a very thin layer of Oh Blush DIP GEL;
- Sprinkle the Oh Blush powder of your choice on the nail, shake to remove the excess, then clear the grooves with an orange stick;
- Cure for 1 minute in a 36W UV or 18W LED lamp;
- Repeat steps 1-3 to achieve desired strength and opacity;
- Apply a very thin layer of Oh Blush DIP GEL and cure for 1 minute;
- Remove the stickiness with 99% alcohol;
- File nails to a smooth surface, then remove dust;
- Finish with a coat of Oh Blush GEL FINISH, cure for 2 minutes in a 36W UV lamp or 30 seconds in an 18W LED lamp.
Removing an Oh Blush Gel and Powder Cover
File the nail surface, then soak your nails in Oh Blush NAIL POLISH REMOVER for 5 minutes.
Repeat until all traces of gel powder are gone.

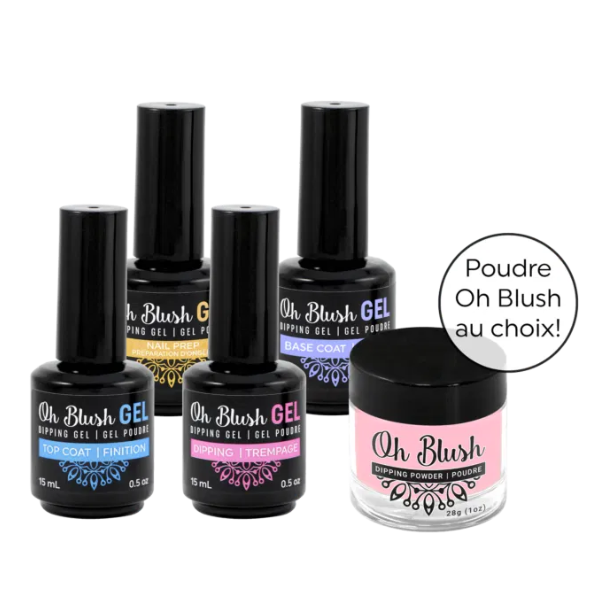
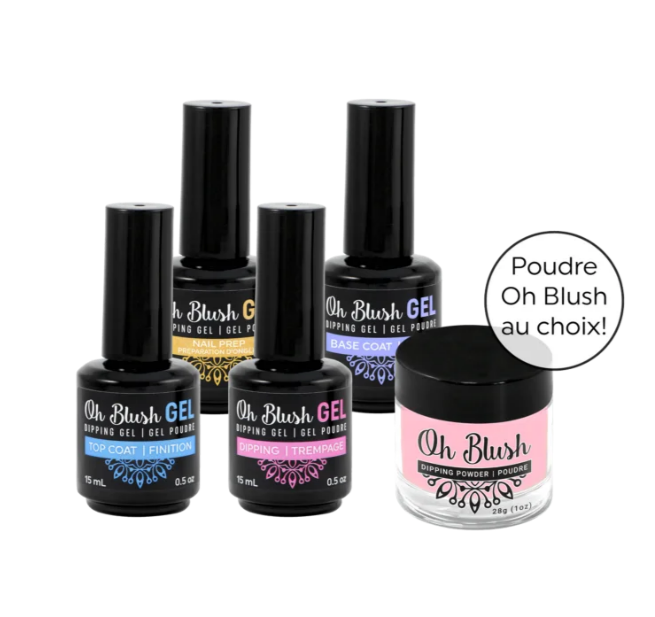
Oh Blush Gel Trial Set including Base, Prep, Dip, Finish and one Oh Blush powder of your choice
The large Oh Blush family is expanding with the GEL range!
Oh Blush gel products allow for quick and easy application!
They are catalyzed in a UV or LED lamp.
They do not require any spray hardener, reducing the risk of allergies and intolerance to spray hardeners or acrylate-based products!
They can be used with all Oh Blush powders and also with all Oh Blush Sparkle powders!
Preparation
- Brush nails with soap and water;
- Push back cuticles and file nails;
- Choose and adjust prostheses (if applicable);
- Run a yellow block over the nail and remove the dust;
- Apply 2 coats of Oh Blush GEL PREP to the nail plate;
- Glue the prosthetics with the Oh Blush DIP BASE & FINISH (if applicable, product sold separately).
Steps for applying the Oh Blush Gel and Powder system
- Apply a very thin layer of Oh Blush GEL BASE and cure for 30 seconds under an 18W LED lamp or for 1 minute under a 36W UV lamp;
- Remove excess with a dry brush;
- Apply a very thin layer of Oh Blush DIP GEL;
- Sprinkle your chosen Oh Blush powder onto the nail, shake off any excess, then smooth out any creases with an orange blossom stick;
- Cure for 1 minute in a 36W UV or 18W LED lamp;
- Repeat steps 1-3 to achieve desired strength and opacity;
- Apply a very thin layer of Oh Blush DIP GEL and cure for 1 minute;
- Remove the stickiness with 99% alcohol;
- File nails to a smooth surface, then remove dust;
- Finish with a coat of Oh Blush GEL FINISH, cure for 2 minutes in a 36W UV lamp or 30 seconds in an 18W LED lamp.
Removing an Oh Blush Gel and Powder Cover
File the nail surface, then soak your nails in Oh Blush NAIL POLISH REMOVER for 5 minutes.
Repeat until all traces of gel powder are gone.
Included in the set:
- Oh Blush GEL BASE
- Oh Blush GEL PREP
- Oh Blush DIP GEL
- Oh Blush GEL FINISH
- 1 Oh Blush Powder of your choice (write your choice in the comments otherwise we will give you a random powder).
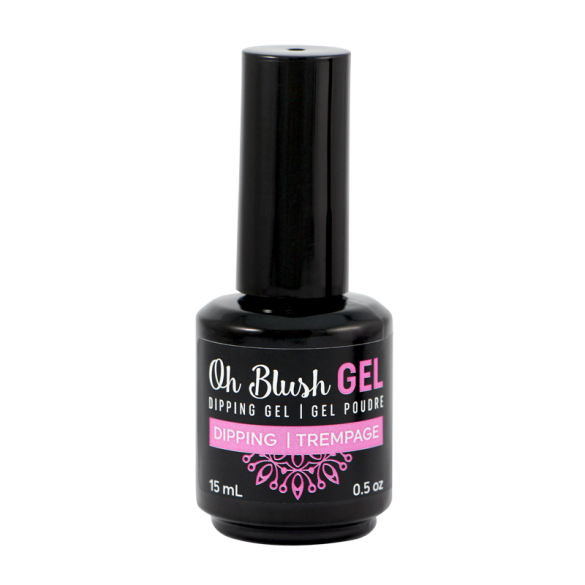
15ml Dipping Gel for Gel and Powder Technique
The large Oh Blush family is expanding with the GEL range!
Oh Blush gel products allow for quick and easy application!
They are catalyzed in a UV or LED lamp.
They do not require any spray hardener, reducing the risk of allergies and intolerance to spray hardeners or acrylate-based products!
They can be used with all powders.
Preparation
- Brush nails with soap and water;
- Push back cuticles and file nails;
- Choose and adjust prostheses (if applicable);
- Run a yellow block over the nail and remove the dust;
- Apply 2 coats of Oh Blush GEL PREP to the nail plate;
- Glue the prosthetics with the Oh Blush DIP BASE & FINISH (if applicable, product sold separately).
Steps for applying the Oh Blush Gel and Powder system
- Apply a very thin layer of Oh Blush GEL BASE and cure for 30 seconds under an 18W LED lamp or for 1 minute under a 36W UV lamp;
- Remove excess with a dry brush;
- Apply a very thin layer of Oh Blush DIP GEL;
- Sprinkle your chosen Oh Blush powder onto the nail, shake off any excess, then smooth out any creases with an orange blossom stick;
- Cure for 1 minute in a 36W UV or 18W LED lamp;
- Repeat steps 1-3 to achieve desired strength and opacity;
- Apply a very thin layer of Oh Blush DIP GEL and cure for 1 minute;
- Remove the stickiness with 99% alcohol;
- File nails to a smooth surface, then remove dust;
- Finish with a coat of Oh Blush GEL FINISH, cure for 2 minutes in a 36W UV lamp or 30 seconds in an 18W LED lamp.
Removing an Oh Blush Gel and Powder Cover
File the nail surface, then soak your nails in Oh Blush NAIL POLISH REMOVER for 5 minutes.
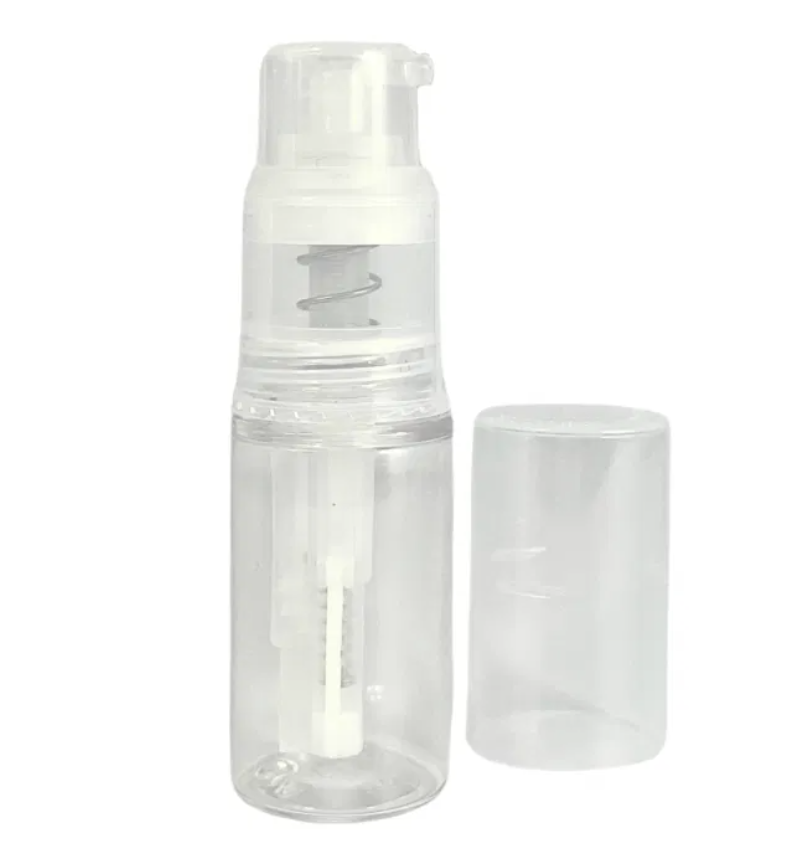
Nail Spray Ombre - Empty Bottle 14ml | Perfect Ombre Effects
Transform your manicures with our Empty Ombre Spray Bottle, the essential tool for creating perfect gradients on your nails using the resin and powder technique. Designed for precise and even application, this bottle allows you to add an artistic touch to your nail designs.
The bottle comes empty, so you can add your favorite powders!


Stylo magnétique double face (fleur/ligne)
Le stylo magnétique double face Fleur et Ligne s'utilise avec une poudre ou un gel magnétique pour créer des motifs ou de la profondeur. Il attire les pigments près de l'espace formé par les deux aimants qui se repoussent. Vous pouvez ainsi créer un motif floral ou linéaire sans altérer le support. Les combinaisons sont infinies : laissez libre cours à votre imagination !

Antifungal Inhibitor Gold Nails (Fungus Inibitor) 15 mL
Antifungal Inhibitor Gold Nails (Fungus Inibitor) 15 mL
Cleans and removes bacteria, prevents infections on the nails and cuticles of hands and feet.

Brush On Gel Base Coat - Base Gel 15mL
Brush On Gel is a UV gel system that strengthens and lengthens natural nails. Brush On Gel brushes have short bristles, making it easier to apply the product precisely.
The gel base of the Brush On Gel effectively binds the Brush On Gel to allow optimal hold of the coating.
Instructions for use on prosthesis or with form (stencil)
- Perform the preparation of the natural nail;
- Apply a prosthesis or a form (stencil);
- Apply one layer of Brush On Gel Base Coat - Base Gel to the natural nail, then dry for 15 seconds under a universal lamp;
- Apply the Brush On Gel Builder - Sculptor to obtain the desired shape and length if there is a template, then dry for 1 minute under an LED lamp;
- File to shape and remove imperfections, then make sure to remove all traces of dust;
- Apply the Brush On Gel Top Coat, then dry for 30 seconds under an LED lamp.
Instructions for use on natural nails
- Perform the preparation of the natural nail;
- Apply one layer of Brush On Gel Base Coat - Base Gel to the natural nail, then dry for 15 seconds under a universal lamp;
- Apply 2 coats of Brush On Gel Shaper - Modeler to the nail, making sure to seal the tip of the nail well each time and cure each coat for 1 minute under an LED lamp;
- Apply the Brush On Gel Top Coat, then dry for 30 seconds under an LED lamp.
* If desired, use a gel polish before applying the Brush On Gel Top Coat.

Golden Nails Product
White Sanding Block (4 Sides) in pack of 12
An essential for preparing the natural nail!
Dimensions of a block: 2.6cm x 2.6cm x 9.5cm
* For hygiene reasons, this item is non-exchangeable and non-refundable.

Bloc Sableur Rose 100/180 (4 Faces)
Un essentiel pour les étapes de pose d'ongles à la résine, au gel et à l'acrylique!
Dimensions d'un bloc: 2.6cm x 2.6cm x 9.5cm
* Pour des raisons d'hygiène, cet article est non échangeable, non remboursable.

Brush On Gel Brush On Gel - Kit complet
Le Brush On Gel, aussi appelé Builder in a bottle, est un système de gel UV qui permet de renforcir l'ongle naturel, tout en permettant d'allonger ce dernier. Les poils des pinceaux des Brush On Gel sont courts, ce qui facilite une application précise du produit.
Ce kit comprend le gel de base, le top, le gel modeleur et le gel sculpteur, 2 blocs et 25 chablons :
- La base gel du Brush On Gel permet de lier efficacement le Brush On Gel afin de permettre une tenue optimale du recouvrement.
- Le Brush On Gel Shaper - Gel Modeleur est un gel rehausseur pour renforcer et protéger l'ongle naturel.
- Le Brush On Gel Builder permet d'allonger les ongles sur formes (chablons) pour une longueur moyenne à longue.
- Le top coat à utiliser comme finition après le recouvrement fait au Brush On Gel.
- Un bloc jaune et un bloc blanc
- Un paquet de 50 chablons pour faire vos extensions
Mode d'emploi du Brush-on Gel sur prothèse ou avec forme (chablon) pour allonger l'ongle
- Effectuer la préparation de l'ongle naturel;
- Appliquer une prothèse ou une forme (chablon);
- Appliquer une couche de Brush On Gel Base Coat - Base Gel sur l'ongle naturel, puis sécher pendant 15 secondes sous une lampe universelle;
- Appliquer le Brush On Gel Builder - Sculpteur afin d'obtenir la forme et la longueur désirée s'il y a un chablon, puis sécher pendant 1 minute sous une lampe LED;
- Limer pour former et retirer les imperfections, puis s'assurer de retirer toutes traces de poussière;
- Appliquer le Brush On Gel Top Coat- Gel de Finition, puis sécher 30 secondes sous une lampe LED.
Mode d'emploi du Brush-on Gel sur ongle naturel sans allongement
- Effectuer la préparation de l'ongle naturel;
- Appliquer une couche de Brush On Gel Base Coat - Base Gel sur l'ongle naturel, puis sécher pendant 15 secondes sous une lampe universelle;
- Appliquer 2 couches de Brush On Gel Shaper - Modeleur sur l'ongle, en s'assurant de bien sceller le bout de l'ongle à chaque fois et sécher chaque couche pendant 1 minute sous une lampe LED;
- Appliquer le Brush On Gel Top Coat- Gel de Finition, puis sécher 30 secondes sous une lampe LED.
* Si désiré, utiliser un vernis gel avant de mettre le Brush On Gel Top Coat - Gel de Finition.

Pro Line Ultra-Fast Spray Hardener
The Ligne Pro Spray Resin Hardener is used to cure (dry) resins. This hardener is specially designed for the Ligne Pro Collection, with a drip-free spray that works every time.
The "Ultra-Fast" formula will cure your resins faster than the "regular" formula. The Ligne Pro Ultra Fast hardener is therefore ideal for curing slow-drying resins such as Boulette resin.
Our hardeners are distinguished by their pleasant fragrance: they smell good!
Compared to other brands, their composition is much gentler on the nails.
Formula with "ultra-fast" concentration.
Instructions for use of the spray hardener
To harden the resin, spray the hardener 8 to 10 inches from the nail. It is important not to spray over the work surface to avoid contaminating it and any products on it.
NB White spots: if you see white spots after spraying, you sprayed too close to the nail!
Storage of spray hardeners
Hardeners in a glass bottle can be stored at room temperature. Those in a plastic bottle should be kept in the refrigerator to prevent premature evaporation!

Golden Nails
The Pro Brush Hardener is used to harden your resins generally during the finishing stage.
Designed specifically for nail professionals, it's powerful and ultra-fast. It ensures a stunning finish every time!

Fini-Plus LED and UV Finish 15 mL
Discover Fini-Plus LED and UV Top Coat 15 mL, the most versatile and long-lasting top coat for all your manicures. This innovative product can be applied over all types of top coats, including resin, UV gel, gel polish, regular polish, and VFP, providing extended protection and a flawless, glossy finish.
The most versatile finish!
- Fini-Plus can be applied to ALL coatings (resin, UV gel, gel varnish, regular varnish, VFP, etc.)
- Odorless, does not yellow
- Provides prolonged protection
- It is ideal for protecting nail decorations, especially since it provides remarkable and long-lasting shine!
- Perfect for chrome, mirror and mermaid effects
How to apply Fini-Plus:
- Apply a single thin coat of Fini-Plus.
- Bake under LED (30 seconds) or UV (1 minute) lamp and you're done!
Withdrawal of Fini Plus:
Fini-Plus does not blend in; simply file gently to remove.
*** Fini-Plus should be kept at room temperature and should be stored in a dark space so as not to come into contact with light.

Golden Nails Product
UV or LED Matte Top Coat
To achieve an unbeatable and long-lasting matte finish!
When combined with the regular Fini-Plus, the Fini-Plus Matte allows you to obtain a superb matte finish!
Fini-Plus Matte can be applied as a finish over regular varnishes, UV varnishes (such as UV varnishes and Shellac), UV gel and resin!
On a regular varnish:
- For optimal results, once your regular varnish is completely dry, apply a thin layer of Fini-Plus regular and cure under the UV lamp (2 minutes) or LED lamp (30 seconds).
- Apply a thin layer of Fini-Plus Matte and cure under the UV lamp (2 minutes) or LED lamp (30 seconds) and you're done!
Your varnish will last from 2 to 4 weeks depending on the varnish used.
On UV gel or UV varnishes:
- For optimal results, apply a thin layer of Fini-Plus regular on your varnish or UV gel and cure under the UV lamp (2 minutes) or LED (30 seconds).
- Apply a thin layer of Fini-Plus Matte and cure under UV lamp (2 minutes) or LED lamp (30 seconds).
On the resin:
- Once the application is complete, use a block to remove any shine from the nails.
- Apply a thin layer of Fini-Plus Matte and cure under UV (2 minutes) or LED (30 seconds) lamp. And there you have it!
Little tip: for striking effects, apply the Fini-Plus Matte to certain sections only!
How to remove the Matte Finish:
Regular Fini-Plus and Matte Fini-Plus do not blend; simply file gently to remove them.
*** Regular Fini-Plus and Matte Fini-Plus should be stored at room temperature and in a dark space so as not to come into contact with light.
No exchange, no refund for this product.


Oh Bling Gel de Construction 3 en 1 Clair - 15ml
Le Oh Bling Gel de Construction 3 en 1 Clair est un gel polyvalent révolutionnaire qui simplifie votre routine de pose d’ongles. Conçu pour répondre aux besoins des techniciennes professionnelles comme des passionnées de nail art, ce gel combine trois fonctions essentielles en un seul produit : extension, sculpture et décoration 3D.
Caractéristiques principales :
-
Viscosité épaisse : Idéal pour la sculpture et les décorations en relief.
-
Polyvalent : Convient pour les décorations 3D, les extensions et les sculptures complexes.
-
Transparence parfaite : Effet cristallin pour sublimer vos designs.

Brush On Gel Top Coat - Finishing Gel 15mL
Brush On Gel is a UV gel system that strengthens and lengthens natural nails. Brush On Gel brushes have short bristles, making it easier to apply the product precisely.
Use this top coat after covering with Brush On Gel.
Instructions for use on prosthesis or with form (stencil)
- Perform the preparation of the natural nail;
- Apply a prosthesis or a form (stencil);
- Apply one layer of Brush On Gel Base Coat - Base Gel to the natural nail, then dry for 15 seconds under a universal lamp;
- Apply the Brush On Gel Builder - Sculptor to obtain the desired shape and length if there is a template, then dry for 1 minute under an LED lamp;
- File to shape and remove imperfections, then make sure to remove all traces of dust;
- Apply the Brush On Gel Top Coat, then dry for 30 seconds under an LED lamp.
Instructions for use on natural nails
- Perform the preparation of the natural nail;
- Apply one layer of Brush On Gel Base Coat - Base Gel to the natural nail, then dry for 15 seconds under a universal lamp;
- Apply 2 coats of Brush On Gel Shaper - Modeler to the nail, making sure to seal the tip of the nail well each time and cure each coat for 1 minute under an LED lamp;
- Apply the Brush On Gel Top Coat, then dry for 30 seconds under an LED lamp.
* If desired, use a gel polish before applying the Brush On Gel Top Coat.

Brush On Gel Shaper - Modeling Gel 15mL
Brush On Gel is a UV gel system that strengthens and lengthens natural nails. Brush On Gel brushes have short bristles, making it easier to apply the product precisely.
Instructions for use on prosthesis or with form (stencil)
- Perform the preparation of the natural nail;
- Apply a prosthesis or a form (stencil);
- Apply one layer of Brush On Gel Base Coat - Base Gel to the natural nail, then dry for 15 seconds under a universal lamp;
- Apply the Brush On Gel Builder - Sculptor to obtain the desired shape and length if there is a template, then dry for 1 minute under an LED lamp;
- File to shape and remove imperfections, then make sure to remove all traces of dust;
- Apply the Brush On Gel Top Coat, then dry for 30 seconds under an LED lamp.
Instructions for use on natural nails
- Perform the preparation of the natural nail;
- Apply one layer of Brush On Gel Base Coat - Base Gel to the natural nail, then dry for 15 seconds under a universal lamp;
- Apply 2 coats of Brush On Gel Shaper - Modeler to the nail, making sure to seal the tip of the nail well each time and cure each coat for 1 minute under an LED lamp;
- Apply the Brush On Gel Top Coat, then dry for 30 seconds under an LED lamp.
* If desired, use a gel polish before applying the Brush On Gel Top Coat.

Brush On Gel Builder - Sculpting Gel 15mL
Brush On Gel is a UV gel system that strengthens and lengthens natural nails. Brush On Gel brushes have short bristles, making it easier to apply the product precisely.
The Brush On Gel Builder allows you to extend nails on forms (stencils) for a medium to long length.
Instructions for use on prosthesis or with form (stencil)
- Perform the preparation of the natural nail;
- Apply a prosthesis or a form (stencil);
- Apply one layer of Brush On Gel Base Coat - Base Gel to the natural nail, then dry for 15 seconds under a universal lamp;
- Apply the Brush On Gel Builder - Sculptor to obtain the desired shape and length if there is a template, then dry for 1 minute under an LED lamp;
- File to shape and remove imperfections, then make sure to remove all traces of dust;
- Apply the Brush On Gel Top Coat, then dry for 30 seconds under an LED lamp.
Instructions for use on natural nails
- Perform the preparation of the natural nail;
- Apply one layer of Brush On Gel Base Coat - Base Gel to the natural nail, then dry for 15 seconds under a universal lamp;
- Apply 2 coats of Brush On Gel Shaper - Modeler to the nail, making sure to seal the tip of the nail well each time and cure each coat for 1 minute under an LED lamp;
- Apply the Brush On Gel Top Coat, then dry for 30 seconds under an LED lamp.
* If desired, use a gel polish before applying the Brush On Gel Top Coat.

Gel UV Perfection Blanc Parfait (Perfect White)
Gel de viscosité claire, utilisé pour créer un sourire très blanc (french manucure) en 1 ou 2 couches seulement. Puisqu'il est très pigmenté, il est très important de l'appliquer en très minces couches. Il est auto-nivelant et ne jaunit pas.
N.B. le gel Perfection Blanc Parfait est trop liquide pour réaliser des extensions avec des chablons.
* Les gels UV de la gamme Perfection d'Ongles d'Or sont des gels qui ne dégagent aucune vapeur toxique*
Possibitilé de faire fondre la pose en appliquant le Gel Fondant Perfection en première couche du recouvrement.
Mode d'emploi des gels UV Perfection
- Appliquez 1 couche de ADHER+ UV PRIMER (cuire 1 minute sous une lampe UV 36W);
- Essuyez l’ongle avec un pinceau propre ou un tampon sans charpie;
- Appliquez au choix le gel Perfection CLAIR SCULPT, UNE ÉTAPE ou ROSE SCULPT
(cuire 2 minutes sous une lampe UV 36W); - Répétez les étapes 2 et 3 pour obtenir la forme désirée;
- Retirez l’effet collant avec un tampon sans charpie et le Nettoyeur Parfait;
- Limez vos ongles pour obtenir une surface lisse et retirez la poussière.
- Appliquez 1 couche de Brillance Parfaite ou de Fini-Plus et cuire sous la lampe.
Conservation du gel UV Perfection Blanc Parfait
Les pots de gels UV Perfection Blanc Parfait doivent être conservés à l'abri des sources lumineuses, à température ambiante

Perfect Shine Gel 1/4 oz
Golden Nails Product

Gel UV Perfection Clair Sculpt (Perfect C Clear)
Gel de viscosité épaisse, utilisé pour former le point de stress ou le C de l'ongle. Très polyvalent, il s'utilise pour une pose d'ongles avec des prothèses, avec des formes (chablons) ou sur ongles naturels. Il est auto-nivelant et ne jaunit pas.
* Les gels UV de la gamme Perfection d'Ongles d'Or sont des gels qui ne dégagent aucune vapeur toxique*
Possibitilé de faire fondre la pose en appliquant le Gel Fondant Perfection en première couche du recouvrement.
Mode d'emploi des gels UV Perfection
- Appliquez 1 couche de ADHER+ UV PRIMER (cuire 1 minute sous une lampe UV 36W);Essuyez l’ongle avec un pinceau propre ou un tampon sans charpie;
- Appliquez au choix le gel Perfection CLAIR SCULPT, UNE ÉTAPE ou ROSE SCULPT
(cuire 2 minutes sous une lampe UV 36W); - Répétez les étapes 2 et 3 pour obtenir la forme désirée;
- Retirez l’effet collant avec un tampon sans charpie et le Nettoyeur Parfait;
- Limez vos ongles pour obtenir une surface lisse et retirez la poussière.
- Appliquez 1 couche de Brillance Parfaite ou de Fini-Plus et cuire sous la lampe.
Conservation du gel UV Perfection Clair Sculpt
Les pots de gels UV Perfection Clair Sculpt doivent être conservés à l'abri des sources lumineuses, à température ambiante.

Golden Nails
Perfection 3 UV Gel Introductory Set
Perfect for technicians already working with UV gel who want to try our brand!
The UV gel kit includes:
- 1 Perfection Fondant Gel (1/4 oz.)
- 1 Clear Sculpt Perfection Gel (1/4 oz.)
- 1 Perfect White Perfection Gel (1/4 oz.)
- 1 Perfect Shine Gel (1/4 oz.)
- 1 Perfect Cleaner (125 mL)
- 1 Adher+ Perfection (UV Primer) Golden Nails (15ml)
- 1 Application step booklet.
* The UV gels in the Perfection d'Ongles d'Or range do not release any toxic fumes*
They are self-leveling and do not yellow.
Possibility of melting the application by applying the Perfection Melting Gel as the first layer of the covering.

Gel UV Perfection Gel Fondant (Perfection Soak Off)
Gel de viscosité medium/claire. Utilisé comme première couche d'un recouvrement de gel UV, le Gel Fondant permet de retirer facilement la pose, car ce dernier fond. Il est auto-nivelant et ne jaunit pas.
* Les gels UV de la gamme Perfection d'Ongles d'Or sont des gels qui ne dégagent aucune vapeur toxique*
Mode d'emploi des gels UV Perfection
- Appliquez 1 couche de ADHER+ UV PRIMER (cuire 1 minute sous une lampe UV 36W);
- Essuyez l’ongle avec un pinceau propre ou un tampon sans charpie;
- Appliquez au choix le gel Perfection CLAIR SCULPT, UNE ÉTAPE ou ROSE SCULPT
(cuire 2 minutes sous une lampe UV 36W); - Répétez les étapes 2 et 3 pour obtenir la forme désirée;
- Retirez l’effet collant avec un tampon sans charpie et le Nettoyeur Parfait;
- Limez vos ongles pour obtenir une surface lisse et retirez la poussière.
- Appliquez 1 couche de Brillance Parfaite ou de Fini-Plus et cuire sous la lampe.
Conservation du gel UV Perfection Gel Fondant
Les pots de gels UV Gel Fondant Perfection doivent être conservés à l'abri des sources lumineuses, à température ambiante.
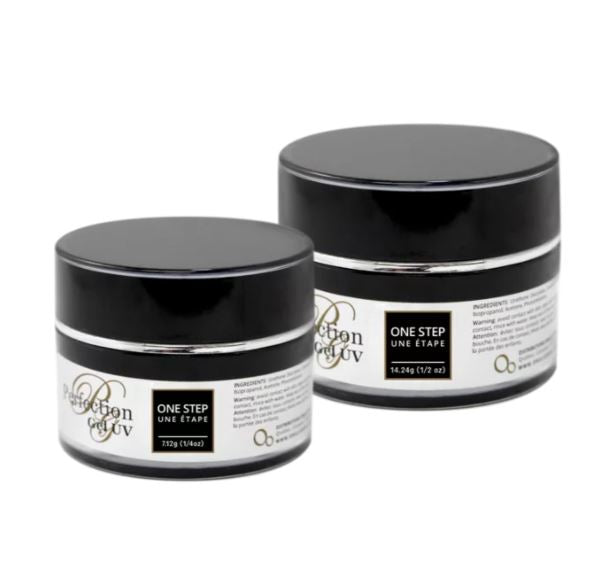
One Step Perfection UV Gel
Medium viscosity clear UV gel that can be used as both a base coat and a glossy top coat! It is self-leveling and non-yellowing.
* The UV gels in the Perfection d'Ongles d'Or range do not release any toxic fumes*
Possibility of melting the application by applying the Perfection Melting Gel as the first layer of the covering.
Instructions for use of Perfection UV gels
- Apply 1 coat of ADHER+ UV PRIMER (cure for 1 minute under a 36W UV lamp);
- Wipe the nail with a clean brush or lint-free pad;
- Apply your choice of CLEAR SCULPT, ONE STEP or PINK SCULPT Perfection Gel
(cook for 2 minutes under a 36W UV lamp); - Repeat steps 2 and 3 to achieve the desired shape;
- Remove stickiness with a lint-free pad and Perfect Cleaner;
- File your nails to a smooth surface and remove any dust.
- Apply 1 coat of Perfect Shine or Fini-Plus and cure under the lamp.
One Step Perfection UV Gel Preservation
One Step Perfection UV gel pots should be stored away from light sources and at room temperature.


Limes courbées ou droites Zebra rudes 100/100.
Idéal pour un usage en pose d'ongles à la résine, au gel UV ou à l'acrylique!
Pour la rugosité de vos limes : plus le chiffre est élevé, plus la lime est douce (ex. : 120 est plus doux que 80).
Dans le cas ou 2 chiffres différents sont mentionnés, les 2 côtés de la lime sont de rugosités différentes.
Disponibles à l'unité ou en paquets de différentes quantités!
* Pour des raisons d'hygiène, cet article est non échangeable, non remboursable.


Produit Ongle d'Or
Paquet de 1, 12, 50
Limes zebra courbées professionnelles très résistante et solide.
Idéal pour un usage en pose d'ongles à la résine, au gel UV ou à l'acrylique!
Pour la rugosité de vos limes : plus le chiffre est élevé, plus la lime est douce (ex. : 120 est plus doux que 80).
Dans le cas ou 2 chiffres différents sont mentionnés, les 2 côtés de la lime sont de rugosités différentes.
* Pour des raisons d'hygiène, cet article est non échangeable, non remboursable.


Limes courbées ou droites Zebra médium 180/180.
Idéal pour un usage en pose d'ongles à la résine, au gel UV ou à l'acrylique!
Pour la rugosité de vos limes : plus le chiffre est élevé, plus la lime est douce (ex. : 120 est plus doux que 80).
Dans le cas ou 2 chiffres différents sont mentionnés, les 2 côtés de la lime sont de rugosités différentes.
Disponibles à l'unité ou en paquets de différentes quantités!
* Pour des raisons d'hygiène, cet article est non échangeable, non remboursable.

Limes courbées Zebra douce 240/240.
Idéal pour un usage en pose d'ongles à la résine, au gel UV ou à l'acrylique!
Pour la rugosité de vos limes : plus le chiffre est élevé, plus la lime est douce (ex. : 120 est plus doux que 80).
Dans le cas ou 2 chiffres différents sont mentionnés, les 2 côtés de la lime sont de rugosités différentes.
Disponibles à l'unité ou en paquets de différentes quantités!
* Pour des raisons d'hygiène, cet article est non échangeable, non remboursable.
Showing 1530/2493
Next